Migration Assistant: Move to a New Mac
How to use Migration Assistant to move your apps, files, user accounts, and settings from an old Mac to a new Mac, during setup or later. What to choose on each screen, and how to fix a slow or stuck Migration Assistant transfer.
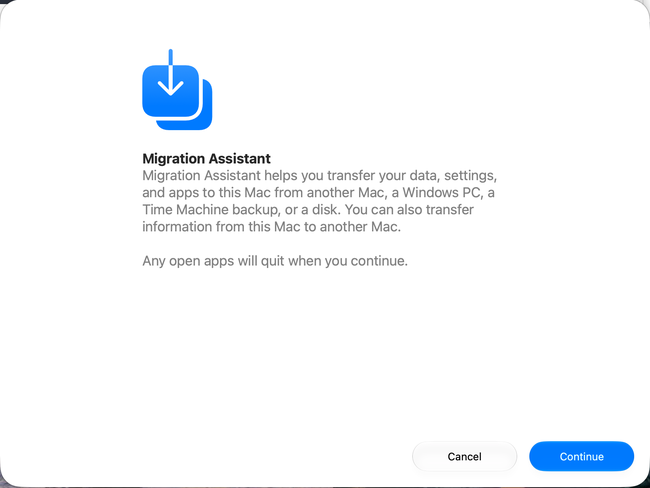
Migration Assistant is the Apple app that copies your data from one computer to another. It moves documents, apps, user accounts, and settings from your old Mac, and it can also transfer from a Time Machine backup or a Windows PC.
Moving your data is often the first step in setting up a new Mac. See the complete Mac setup checklist. This article is part of a series on Mac Setup.
Tested on macOS 27 Golden Gate, September 2026.
Before you get started
Migration Assistant needs no command line, but a new Mac is a good time to upgrade the terminal application. Apple includes the Mac terminal but I prefer Warp Terminal. Warp is an easy-to-use terminal application, with AI assistance to help you learn and remember terminal commands. Download Warp Terminal now; it's FREE and worth a try.
See what Migration Assistant moves to a new Mac
When you choose what to transfer, Migration Assistant groups your data into these categories:
- Applications: your installed apps. Apps that don't work on the new Mac, or that are already installed there in a newer version, may not transfer or work.
- User accounts: each account's documents, pictures, movies, desktop, downloads, and more. Expand an account to choose its folders.
- Other Files & Folders
- Privacy & Security Settings
- System & Network: expand it to choose which settings to bring.
Migration Assistant does not delete anything from your old Mac. It does not replace macOS on the new Mac either, so the new Mac keeps its own macOS version.
Prepare both Macs before you transfer
Apple recommends a few steps before you start. Do these on both Macs:
- Update macOS. Install all available updates on each Mac. See update macOS. The two Macs don't need to run the same macOS version, but if the old Mac runs a newer version, the new Mac asks you to update first.
- Connect to power. Plug in any laptop so its battery does not run down partway through.
- Keep the Macs close together. For a wireless transfer, turn on Wi-Fi on both Macs and keep them near each other. Apple says both Macs must join the same Wi-Fi network only if one of them runs OS X El Capitan or earlier.
- Consider a cable. Apple says connecting the Macs directly with a cable is often faster than a wireless transfer. See the cable tips in the troubleshooting section below.
- Turn off antivirus, firewall, and VPN software until the transfer finishes.
Two more steps help the transfer go smoothly:
- Back up the old Mac. Make a Time Machine backup of the old Mac on an external drive. A transfer does not delete anything, but a backup gives you a second way to transfer if a direct transfer fails.
- Save your work on the old Mac. Migration Assistant quits your open apps when it starts.
- Move passwords with Migration Assistant, not by copying files. Since macOS Tahoe 26.4, a login keychain opens only on the Mac that created it, so a keychain file copied by hand will not open on the new Mac. A direct transfer from the old Mac moves its contents correctly, while a transfer from a Time Machine backup may not.
Transfer data to a new Mac during setup
When you turn on a new Mac for the first time, Setup Assistant walks you through setup, and it includes Migration Assistant. Transferring at this point means you don't create an account on the new Mac first, so you avoid two accounts with the same name.
- On the new Mac, continue through Setup Assistant until you see the
Transfer Your Data to This Macscreen. It asks "How do you want to transfer your information?" - Choose
From a Mac, Time Machine, or startup disk, then clickContinue. - On the old Mac, open Migration Assistant, as described in the next section. Setup Assistant says you can also click the notification that appears on the old Mac.
- Follow the screens described in the section on choosing options below.
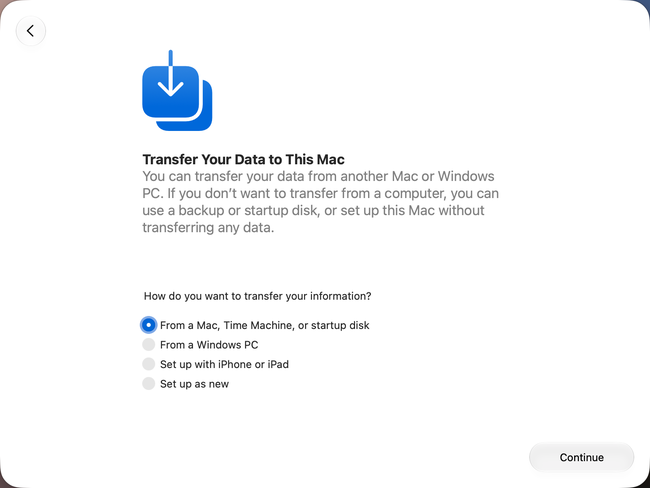
The same screen offers From a Windows PC, which needs Apple's Windows Migration Assistant on a PC running Windows 10 or later, and Set up as new, which skips the transfer. For the PC route, follow Apple's guide to transfer from a PC to a Mac.
Open Migration Assistant on a Mac that is already set up
You always open Migration Assistant yourself on the old Mac. You also open it on the new Mac if you already finished Setup Assistant there. Open it in one of these ways:
- Choose
Apple menu>System Settings>General>Transfer or Reset, then clickOpen Migration Assistant. - In the Finder, open
Applications>Utilitiesand double-clickMigration Assistant. - Press
Command+Spaceto open Spotlight, typeMigration Assistant, and open it.
Click Continue, then enter your administrator password if Migration Assistant asks for it.
Choose the options on each Migration Assistant screen
The steps switch between the two Macs. Keep both screens in view.
Choose which way to transfer
On the new Mac, choose From a Mac, Time Machine, or startup disk, then click Continue. On the old Mac, choose To another Mac, then click Continue.
Select the old Mac and confirm the code
The new Mac lists the Macs, backups, and disks it can transfer from. Select the old Mac's icon, then click Continue.
A security code may appear on the old Mac. Check that it matches the code on the new Mac, then click Continue. The matching code confirms you are connecting the right two Macs.
Choose what to transfer
The new Mac calculates how much data each category holds, which can take a while. Select the categories you want, or expand a category to choose individual items. Then click Continue.
Set passwords for transferred accounts
Apple's instructions say a transferred administrator account needs a new password, which you create with Set Password. A standard account gets a temporary password shown on screen. Write it down, because you need it to log in.
Replace or keep an account with the same name
If the new Mac already has an account with the same name as one you transfer, you see a message such as "“alex” account already exists on this Mac. Do you want to replace the account or keep both?" This usually happens when you created an account during setup and ran Migration Assistant afterward.
- Keep both: choose a different name for the incoming account. Both accounts stay on the new Mac.
- Replace: the incoming account takes the place of the existing one. Apple says the existing account's files may be kept in a Deleted Users folder.
Keep both if you are unsure. You can remove an account you don't need later.
Authorize the transfer
If the new Mac asks, click Authorize and enter the password of an existing user on that Mac.
Wait for the transfer to finish
The new Mac shows Transferring Your Information while it copies your data. Apple says large transfers can take hours and may seem to pause.
When the transfer finishes, follow the prompts on both Macs, then log in to the transferred account on the new Mac.
Check your new Mac after the transfer
Before you rely on the new Mac, check these things:
- Open your apps. An app that doesn't work on the new Mac may not transfer or open. Reinstall any app that has a problem.
- Check your email. Mail transfers, but you may need to set up your email account again.
- Look for your files. Open your home folder in the Finder and check your documents, desktop, and downloads.
When everything you need is on the new Mac, you can erase the old Mac before you sell it, trade it in, or give it away. Keep the old Mac as it is for a few days first, in case you find something missing. See How to Factory Reset a Mac.
Fix a slow or stuck Migration Assistant transfer
A large transfer takes a long time, and one that looks stuck is often still working. Try these checks before you start over.
Give a large transfer time
Apple says large transfers can take hours and may seem to pause. If the screen shows a time remaining, treat it as a rough estimate, especially near the start, and wait before deciding the transfer has stopped.
Find the old Mac when it does not appear
If the old Mac doesn't appear on the new Mac, Setup Assistant asks you to make sure both Macs are on the same network or connected with a cable. On the old Mac, open Migration Assistant and choose To another Mac, or click the notification that appears on it. Turn off any antivirus, firewall, or VPN software on both Macs, as Apple recommends.
Connect the Macs with a cable
Apple says a direct cable connection is often faster than a wireless transfer. Apple's deployment guide adds that Migration Assistant uses the fastest connection available and keeps checking for a faster one during the transfer.
If both Macs have Thunderbolt ports, Macworld recommends a Thunderbolt cable with the Thunderbolt logo on both ends. Macworld also notes that the USB-C charge cable that comes with a Mac transfers data at slow USB 2 speed.
Update and restart both Macs
Install all macOS updates on both Macs, as Apple recommends. If a transfer stops or fails, restarting both Macs and starting again is a practical first step. If the new Mac shows "A startup networking error occurred. Please restart this machine and try again later.", restarting is the step the message itself asks for.
Transfer from a Time Machine backup instead
If a direct transfer keeps failing, transfer from a backup. Back up the old Mac with Time Machine to an external drive, and connect the drive to the new Mac. In Migration Assistant, choose From a Mac, Time Machine, or startup disk, select the backup disk, then select the backup you want. Some people whose Mac-to-Mac transfers failed in macOS Tahoe 26 finished their move this way.
Continue setting up your Mac
Don't miss the full visual roadmap and checklist that shows how to set up a Mac for software development, with all the essential tools and settings you might not yet know about.