Install Ruby with Asdf
How to install Ruby on a Mac using the asdf version manager. Compare to Mise, a faster version manager.
Here are instructions for installing Ruby using asdf, the software version manager.
Note: I now recommend Mise as a version manager. Mise is a faster, modern alternative to asdf with the same plugin ecosystem. See the article Compare Ruby Version Managers.
The asdf instructions below remain valid, if you don't want to use Mise.
Installing Ruby is part of setting up your Mac for development. See the complete Mac setup roadmap.
Before you get started
Take a minute to subscribe to Ruby Weekly, an email roundup of Ruby news and blog posts. I stay up to date with Ruby Weekly, as do 39,000 other developers. You can subscribe for free.
Install asdf
Is Homebrew installed?
Check if Homebrew is installed:
$ brew doctor
Your system is ready to brew.
If Homebrew is not installed, see the instructions to Install Homebrew.
Install asdf with Homebrew
You can install asdf using Homebrew.
$ brew install asdf
The Homebrew post-installation message for asdf mentions, "zsh completions have been installed to: /opt/homebrew/share/zsh/site-functions" (on Mac M1, M2, M3), meaning that asdf commands are auto-completed by pressing the tab key when you are using the Terminal application.
You can confirm that Homebrew installed asdf with brew list.
$ brew list
==> Formulae
asdf		ca-certificates	libtool		openssl@3
autoconf	coreutils	libyaml		readline
automake	gmp		m4		unixodbc
After installing asdf with Homebrew, you can view the installed dependencies with brew deps --tree --installed.
Add asdf to the .zshrc file
You must add asdf to the shell environment before you can use it to manage Ruby versions. The Homebrew post-installation message (on Mac M1, M2, M3) for asdf says:
To use asdf, add the following line (or equivalent) to your shell profile
e.g. ~/.profile or ~/.zshrc:
  . /opt/homebrew/opt/asdf/libexec/asdf.sh
Use a shortcut to configure your shell to use asdf:
$ echo -e "\n. $(brew --prefix asdf)/libexec/asdf.sh" >> ~/.zshrc
Check the ~/.zshrc file.
$ cat ~/.zshrc
You should see configuration commands for asdf on the last line.
On Mac M1, M2, M3:
. /opt/homebrew/opt/asdf/libexec/asdf.sh
For Mac Intel:
. /usr/local/opt/asdf/asdf.sh
Configuration for asdf should always be the last line in the ~/.zshrc file, after setting any $PATH configuration.
Close and reopen the Terminal window for the changes to the ~/.zshrc file to be recognized. Alternatively (this is easier), you can use the source command to reset the shell environment:
$ source ~/.zshrc
After resetting the shell, use asdf --version to check that asdf was installed successfully.
$ asdf --version
v0.13.1
If the asdf command doesn't work, make sure you've added the asdf configuration to your .zshrc file and restarted the Terminal application.
For more about configuring the shell, see Shell Configuration and the Mac Path.
Add the .asdfrc configuration file
If you are working on any older projects that use a .ruby-version file to specify a Ruby version, add a .asdfrc configuration file to your user home directory to enable asdf to read .ruby-version files.
$ echo "legacy_version_file = yes" >> ~/.asdfrc
Confirm the creation of the configuration file.
$ cat ~/.asdfrc
legacy_version_file = yes
Asdf .tool-versions file
When you work on a project, you can tell asdf which language versions you need by adding a .tool-versions file to your project folder. This is a multi-language alternative to configuration with the .ruby-version file.
ruby 3.4.1
nodejs 10.16.0
More
The Uninstall Asdf page explains how to remove asdf, if you decide not to use it.
After installing the Asdf version manager, you can install Ruby.
Install Ruby with asdf
First, install the asdf plugin for Ruby:
$ asdf plugin add ruby
See all the versions of Ruby that are available:
$ asdf list all ruby
If you don't see the newest version of Ruby, update the asdf plugin for Ruby and try again:
$ asdf plugin-update ruby
$ asdf list all ruby
Install the latest version of Ruby:
$ asdf install ruby latest
You'll see diagnostic messages and progress updates. Installation takes less than five minutes on Apple Silicon (M-series) with a fast Internet connection.
Asdf automatically installs OpenSSL which is a dependency for many Ruby gems.
You need to specify a default version of Ruby in your home ~/.tool-versions file. You can set the ~/.tool-versions file with a command:
$ asdf global ruby 4.0.2
Important: Close and reopen the Terminal window for the changes to the ~/.zshrc file to be recognized. Alternatively (this is easier), you can use the source ~/.zshrc command to reset the shell environment.
Verify installation of Ruby
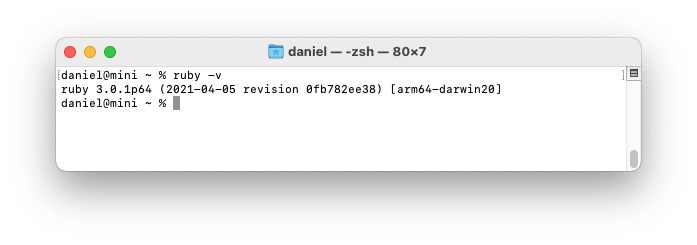
Verify that the newest version of Ruby is installed with ruby -v.
If you see Ruby version 2.6.10, it is the system Ruby and you likely forgot to close and re-open the terminal window.
If you see No version set for command ruby, you need to specify a default version of Ruby in your asdf ~/.tool-versions file.
If you don't see the latest version of Ruby, perhaps you installed Ruby previously with asdf and you need to reset the asdf ~/.tool-versions file.
Check for a ~/.tool-versions file.
$ cat ~/.tool-versions
Edit the ~/.tool-versions file (or create it if it doesn't exist) to set a default Ruby version.
ruby 4.0.2
The Uninstall Ruby section explains where Ruby versions are installed and how to remove them.
Next, you can optimize the Ruby development environment by updating gems. See the next section, Check Ruby Gems and Bundler.
Use asdf as a version manager
You can install an earlier version of Ruby, for example Ruby 2.7.3.
$ asdf install ruby 2.7.3
For the current shell session, you can switch Ruby versions from the command line with asdf shell ruby 2.7.3. Opening the terminal will always use the default version of Ruby you specified initially with asdf global ruby 4.0.2.
The command asdf list ruby will show all installed versions of Ruby.
$ asdf list ruby
To override the default version of Ruby for a particular project, move into the project root directory and enter the command asdf local ruby <version>.
$ asdf local ruby 2.7.3
The command will write a .tool-versions file in the current directory containing a Ruby version number.
The command asdf current will display all the asdf-installed software versions that are currently active.
If you no longer need a Ruby version, asdf can remove it with asdf uninstall ruby 2.7.3.
Continue setting up your Mac
Don't miss the full visual roadmap and checklist that shows how to set up a Mac for software development, with all the essential tools and settings you might not yet know about.