Brew Install Ruby
How to install Ruby with Homebrew. Instructions for brew install ruby. Homebrew is an easy way to install Ruby. However, consider alternatives to brew install ruby if you need to switch among Ruby versions.
First decide if you should install Ruby with Homebrew or if you need a language version manager.
Developers install Homebrew on a Mac for all the useful utilities needed for development. Homebrew also installs programming basics such as Xcode Command Line Tools.
But Homebrew is a package manager, not a version manager. It only installs one version of Ruby. You cannot switch among Ruby versions with Homebrew. That's a drawback if you can't upgrade all your projects to the same version of Ruby. Install a version manager if you need to switch among Ruby versions. I recommend Mise or rv for Ruby installation and version management. See Choose a Ruby Version Manager for Mac.
Installing Ruby is one step in setting up your Mac for development. See the full roadmap to set up a Mac for software development.
Before you get started
Take a minute to subscribe to Ruby Weekly, an email roundup of Ruby news and blog posts. I stay up to date with Ruby Weekly, as do 39,000 other developers. You can subscribe for free.
Is brew install ruby right for you?
Use Homebrew to install Ruby if you are a casual user and won't be using Ruby frequently. For example:
- you are just learning Ruby;
- you are building only one project.
Here are drawbacks to installing Ruby with Homebrew:
- Homebrew may update Ruby to a new version when you upgrade other Homebrew packages.
- You won't be able to switch between multiple Ruby versions.
I recommend version managers Mise or rv instead of Homebrew if you work on multiple projects.
First steps to install Ruby with Homebrew
You should check the macOS version. Take the time to make sure your operating system is up to date and update macOS to the latest macOS version. Then Set Up a Mac Like a Pro with all the best settings and preferences.
Here are the steps for installing Ruby with Homebrew on a Mac.
- Install Homebrew if it is not already installed.
- Install Ruby with
brew install ruby. - Update
$PATHsettings in a shell configuration file.
A warning about the Mac system Ruby
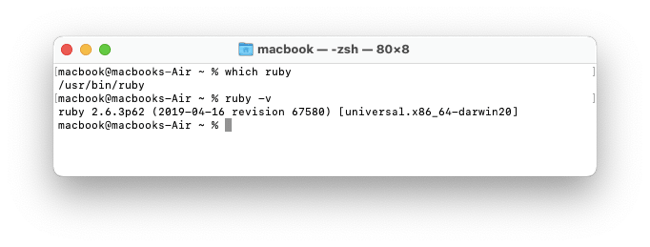
MacOS comes with a "system Ruby" pre-installed, a very old version of Ruby intended for Apple system use. You can see the system Ruby with which ruby and ruby -v.
Leave the system Ruby in place and install the newest Ruby version using Homebrew or a version manager. See the article Why You Shouldn't Use macOS System Ruby for an explanation.
Install Homebrew
Mac Install Guide has complete instructions for installing Homebrew, better than the official Homebrew documentation. If you haven't already installed it, see the article Install Homebrew before you start. If you haven't already installed XCode Command Line Tools, you'll need it, and Homebrew will install it for you.
Check that Homebrew is installed properly with brew doctor.
$ brew doctor
Your system is ready to brew.
See Command not found: brew if you get an error.
Install Ruby
Use Homebrew to install the default Ruby with brew install ruby. You'll see diagnostic messages and progress updates.
$ brew install ruby
.
.
.
Check that Homebrew has installed Ruby with brew list.
$ brew list
==> Formulae
libyaml		openssl@3	ruby
You'll see any packages that you installed previously with Homebrew, plus ruby and two dependencies. Homebrew handles the runtime dependencies automatically and you do not need to install ca-certificates or readline separately.
At this point, the only way to use the Ruby installed by Homebrew is with a full directory path: /opt/homebrew/opt/ruby/bin/ruby. You need to set your shell $PATH environment variable to allow the shell to find the Ruby runtime. Homebrew requires you to explicitly set the $PATH to override the macOS system Ruby.
Configure the shell environment
You'll need to set the $PATH so the Homebrew-installed Ruby takes priority over the macOS system Ruby. Plus you'll need to set the $PATH environment variable to add the directory used for Ruby gems.
Homebrew shows a "Caveats" install message but it is intentionally minimal: it only tells you how to make ruby come first in your PATH. You must also set a gem-bin location because gems (Ruby software libraries) are installed to a directory that is separate from Ruby’s main binary directory.
For the default macOS Z shell, you can edit either the ~/.zshrc or ~/.zprofile shell configuration files. The article .zshrc or .zprofile explains which configuration file to use. The path to the Homebrew directory is set in the ~/.zprofile file; Homebrew suggests adding the path to the Ruby executable in the ~/.zshrc file so it loads to PATH after the Homebrew directory is set, but you could also add it to the ~/.zprofile file following the Homebrew directory if you like to keep all PATH settings in one place. See the guide Mac PATH for more details. Here's a shortcut to open the file in TextEdit from the Terminal:
$ open -e ~/.zshrc
Or use your preferred editor to edit the ~/.zshrc or ~/.zprofile file.
Apple Silicon (M-series)
On Apple Silicon, add this at the end of your ~/.zshrc or ~/.zprofile file.
if [ -d "/opt/homebrew/opt/ruby/bin" ]; then
  export PATH=/opt/homebrew/opt/ruby/bin:$PATH
  export PATH=`gem environment gemdir`/bin:$PATH
fi
Save the file. This sets the Homebrew-installed Ruby to a higher priority than the system Ruby and adds the directory used for Ruby gems.
Mac Intel
On Mac Intel, add this at the end of your ~/.zshrc or ~/.zprofile file.
if [ -d "/usr/local/opt/ruby/bin" ]; then
  export PATH=/usr/local/opt/ruby/bin:$PATH
  export PATH=`gem environment gemdir`/bin:$PATH
fi
Save the file. This sets the Homebrew-installed Ruby to a higher priority than the system Ruby and adds the directory used for Ruby gems.
Reset the shell session
Close and reopen the terminal window to load the changes to the configuration file. Or enter source ~/.zshrc or source ~/.zprofile to reset the shell environment without closing the terminal window.
$ source ~/.zprofile
$ source ~/.zshrc
The source command reads and executes a shell script file, resetting the shell environment.
Confirm Ruby installation
Verify that the Homebrew version of Ruby is installed with ruby -v.
$ ruby -v
ruby 4.0.2
You should see the Homebrew default Ruby version number.
When this was written, Ruby 4.0.2 was the newest version installed by Homebrew.
Troubleshooting
If you need to uninstall Ruby, see the guide Uninstall Ruby. If you run into problems, see Troubleshoot Ruby Installation.
If you run ruby -v and see Ruby version 2.6.10, it is the system Ruby. Try closing and re-opening the terminal window.
Check the $PATH environment variable.
$ echo $PATH
/opt/homebrew/lib/ruby/gems/4.0.0/bin:/opt/homebrew/opt/ruby/bin:/opt/homebrew/bin:/opt/homebrew/sbin:/usr/local/bin:/usr/bin:/bin:/usr/sbin:/sbin
On Apple Silicon, you'll see /opt/homebrew/. On Mac Intel, you'll see /usr/local/.
You can confirm that Homebrew installed Ruby with brew list.
$ brew list
==> Formulae
libyaml  openssl@3  ruby
You can see a list of the dependencies installed for Ruby with brew deps --tree --installed.
$ brew deps --tree --installed
ruby
├── libyaml
└── openssl@3
    └── ca-certificates
Pin Ruby
Homebrew may update Ruby to a new version when you upgrade other Homebrew packages. If you don't want Homebrew's Ruby version to be replaced by a newer version, you can use brew pin ruby to prevent updates to Ruby.
$ brew pin ruby
There is no response or result from the command. And there is no diagnostic that indicates that Ruby is pinned. You'll simply see an error message when another Homebrew package tries to update Ruby.
Continue setting up your Mac
Finish updating the Ruby development environment by updating gems. See the Check Ruby Gems and Bundler article next. You can also learn about What's New in Ruby 4.0 or read about how to Update Ruby later.
Don't miss the full visual roadmap and checklist that shows how to set up a Mac for software development, with all the essential tools and settings you might not yet know about.