Install Pipx
Install Pipx on Mac. What is Pipx. Brew install pipx. How to use Pipx. Pipx for installing Python programs without conflicts and headaches.
What is Pipx? Pipx is a package manager for Python command-line applications. If you are new to Python and following a README or tutorial that asks you to pip install <package> for a utility or tool, you should use UV or Pipx instead. Pipx installs Python packages in isolated environments, preventing conflicts among Python programs that share dependencies. Pipx simplifies the management of Python utilities with commands for installing, listing, upgrading, and uninstalling packages. This guide shows you how to install Pipx on Mac and use it to manage Python packages.
Installing Pipx is one step in setting up your Mac for software development. See the full roadmap to set up a Mac for software development.
Before you get started
You'll need a terminal application to install Pipx and run Python programs. Apple includes the Mac terminal but I prefer Warp Terminal. Warp is an easy-to-use terminal application, with AI assistance to help you learn and remember terminal commands. Download Warp Terminal now; it's FREE and worth a try.
Pipx for utilities; not for programming
There are two common reasons for using Python on a Mac: running a command-line application or writing code for programming projects.
Use UV or Pipx for command-line applications and utilities. There are a growing number of stand-alone programs that require Python to run, such as Youtube-dl, a command-line utility to download videos from YouTube. In addition to stand-alone Python programs, Python programming tools, such as Ruff, a Python code formatter, should be installed with UV or Pipx. Programming tools must be available to all projects ("globally") but isolated from each other.
For programming projects, don't use Pipx. Instead, I recommend to Install UV for programming. Like Pipx, UV installs Python libraries in isolated environments, preventing conflicts among Python programs that share dependencies, but UV is faster and provides a set of unified commands.
If you see pip install <package>, ask yourself if you are installing a software library that will be used in a programming project (in which case, use UV), or if you are installing a stand-alone program or utility (in which case, use UV or Pipx).
Pipx or UV
UV is a new favorite for installing and managing Python on macOS. UV provides an all-in-one approach that's 10-100x faster than previous tools, for either stand-alone utilities or complex programming projects, eliminating the need for separate tools such as pip, pip-tools, pipx, poetry, pyenv, or virtualenv.
UV provides built-in commands for tool management that replace Pipx. You can use the commands uv tool install or the shorthand uvx command instead of Pipx. As an example, here's the installation and use of the ruff code formatter:
# Run a tool in a temporary environment
$ uvx ruff check .

# Install a tool permanently
$ uv tool install ruff
$ ruff --version
However, if you are following a tutorial or README that uses Pipx, or you want to get familiar with older tools in the Python ecosystem, you may want Pipx instead of UV.
Pipx limitations
Pipx installs Python applications from PyPI, the Python package repository. but it does not support all Python applications. Pipx only works with applications that are built with "console script entry points." These entry points let users call into Python code from the command line, effectively acting like standalone applications. Not all Python packages are suitable as standalone applications, particularly software libraries that are intended for import into other Python code. Use UV or Pip for project dependencies.
Why to use Pipx
It helps to know why developers use Pipx. Fundamentally, Pipx makes it easy to install Python utilities and standalone applications, much like Homebrew simplifes the installation of command-line tools on macOS. More importantly, Pipx installs Python applications in isolated environments, avoiding conflicts with other Python applications. Automatically managing "virtual environments" is not immediately apparent as a benefit; it is only after discovering conflicts between Python applications that the value of isolation becomes clear. You can think of use of Pipx as simply "good hygiene," like using dental floss to minimize future dentist visits.
How to install Pipx on Mac
If you do not have Python installed on your Mac, don't install Python first! Instead, Install Homebrew first. Then install Pipx directly with brew install pipx. Homebrew will install the latest Python version as a dependency. Instructions are below.
If you already have Python installed on your Mac, see the article Update Python. There are many ways to install Python, some of which introduce complications. If all you need is Python for running utilities, I recommend ignoring other Python versions and using Homebrew to install Pipx. However, I've provided instructions for installing Pipx with other Python versions below.
Steps
- Install Homebrew: If you don't have Homebrew, Install Homebrew first.
- Install Pipx: Open the terminal and run
brew install pipx. - Update the Mac PATH: Add the
~/.local/binfolder to your Mac PATH.
Install Pipx with Homebrew
Homebrew is a software package manager for Mac. Homebrew simplifies the installation of software on your Mac.
If you wish to install Pipx without Homebrew, using a Python version you have previously installed, I've provided instructions at the end of this article. However, I recommend using Homebrew to install Pipx. This is the simplest way to install Pipx.
Check that Homebrew is ready
Before you install Pipx, check that Homebrew is ready.
- Use
brew listto see all the packages in your local environment. - Run
brew updateto update Homebrew. - Run
brew doctorto check that Homebrew is ready.
If Homebrew is not installed, you will see:
zsh: command not found: brew
See Zsh: command not found: brew for troubleshooting. Either Homebrew is not installed or the Mac PATH is not set in a ~/.zprofile or ~/.zshrc configuration file. Without a correct $PATH, the shell cannot find the brew command.
Brew list
Use brew list to see all the packages in your local environment.
$ brew list
It is good to see what you've installed previously so you can check again after you install Pipx.
Brew update
Before you install any software package with Homebrew, run brew update to update Homebrew. Updating Homebrew can take many minutes, so run the update before trying to install a package. It is better to run the update yourself rather than waiting for Homebrew to run the updates automatically. This will update any core dependencies that your package may need.
$ brew update
Already up-to-date.
Homebrew core packages are updated as often as every day, so it is likely you will see updates.
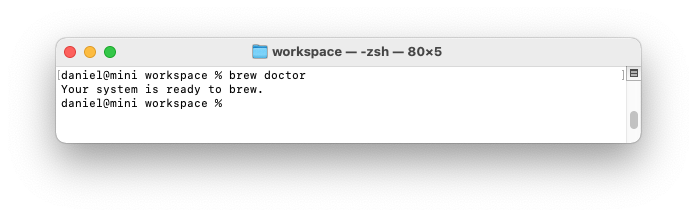
Brew doctor
Before you install any software package with Homebrew, run brew doctor to check that Homebrew is ready to install a package.
$ brew doctor
Your system is ready to brew.
Brew install
Now you can install Pipx with brew install pipx.
$ brew install pipx
.
.
.
==> Fetching dependencies for pipx: mpdecimal, readline, sqlite, xz and [email protected]
.
.
.
==> Installing pipx dependency: [email protected]
.
.
.
==> Installing pipx
==> Pouring pipx--1.5.0.arm64_sonoma.bottle.tar.gz
.
.
.
==> Summary
🍺  /opt/homebrew/Cellar/pipx/1.5.0: 149 files, 1021.8KB
==> Running `brew cleanup pipx`...
.
.
.
The console will show the downloaded files and dependencies. The console shows the location of the installed package. Notice that Homebrew installs the latest version of Python as a dependency, unless you already have installed Python with Homebrew.
You can verify that Homebrew installed Pipx by running brew list.
$ brew list
==> Formulae
pipx
[email protected]
ca-certificates
mpdecimal
openssl@3
readline
sqlite
xz
Pipx is installed, as well as the latest Python and various dependencies.
Verify that Pipx is installed
The pipx command should now be available in the terminal. Run pipx --version to verify that Pipx is installed.
$ pipx --version
1.5.0
If you've set up Homebrew correctly, you can run pipx from the terminal. If you see command not found: pipx, you need to add the Homebrew bin folder to your PATH. Homebrew recommends adding eval "$(/opt/homebrew/bin/brew shellenv)" to the ~/.zprofile file, which sets up the PATH and other environment variables. See Install Homebrew and Mac PATH.
Python and your PATH
Homebrew installed Python as a dependency for Pipx. However, if you want to use the Homebrew-installed Python, you need to add it to your PATH. Add an export directive as the last line in your ~/.zprofile file so the Homebrew-installed Python will take precedence over other versions:
export PATH="$(brew --prefix python)/libexec/bin:$PATH"
To complete the change, restart your terminal or source the configuration file (source ~/.zshrc). Afterwards, run python --version to verify that the Homebrew Python is available.
$ python --version
Python 3.13.3
Just to clarify, it is not necessary to add the Homebrew Python to your PATH to use Pipx. Pipx will use Python automatically. However, if you want to use the Homebrew Python for writing scripts or Python programming, you need to add it to your PATH.
Pipx and your PATH
You can run pipx to install various Python programs. For example, to install the cowsay program, run pipx install cowsay.
$ pipx install cowsay
  installed package cowsay 6.1, installed using Python 3.13.3
  These apps are now globally available
    - cowsay
⚠️  Note: '/Users/username/.local/bin' is not on your PATH environment variable.
    These apps will not be globally accessible until your PATH is updated. Run
    `pipx ensurepath` to automatically add it, or manually modify your PATH in
    your shell's config file (i.e. ~/.bashrc).
done! ✨ 🌟 ✨
Attempting to run the cowsay program will fail, even though it is installed with Pipx.
$ cowsay
zsh: command not found: cowsay
The first time you install a program with Pipx, you will see a message that Pipx-installed programs are not on your PATH. You can run pipx ensurepath to add the ~/.local/bin folder to your PATH. Alternatively, you can manually add the folder to your PATH by editing your ~/.zprofile file.
$ pipx ensurepath
Success! Added /Users/username/.local/bin to the PATH environment variable.
The command pipx ensurepath adds export PATH="$PATH:/Users/username/.local/bin" folder to your Zsh configuration files. If you have both ~/.zprofile and ~/.zshrc files, the command will add the line to both files (that's okay, even though redundant).
For every installed program, Pipx adds a symbolic link to the ~/.local/bin folder with an executable installed in the ~/.local/pipx/venvs folder. It is all automated for convenience.
You must restart your terminal or source the configuration file (source ~/.zshrc) to apply the changes. The which command shows where Pipx installed the cowsay program.
$ which cowsay
/Users/username/.local/bin/cowsay
Now you can run cowsay to see the program in action.
$ cowsay -t hello
  _____
| hello |
  =====
     \
      \
        ^__^
        (oo)\_______
        (__)\       )\/\
            ||----w |
            ||     ||
Cowsay is one of the most important Python programs you can install (not really!). But now you can install and run other important Python utilities and tools.
How to use Pipx
You can see the full Pipx documentation for all Pipx commands and options. Here is a summary of the most important commands.
Install a Python program with Pipx
The pipx install command installs programs globally, making them accessible from any terminal session.
$ pipx install <program>
If you added the ~/.local/bin folder to your PATH, you can run the application from the command line.
List installed programs
The pipx list command shows all installed programs.
$ pipx list
Use the command to check which programs you've installed.
Upgrade a program
The command pipx upgrade updates an program to its latest version.
$ pipx upgrade <program>
The command pipx upgrade-all upgrades all installed programs.
You can downgrade a program to a specific version with the pipx install command and the --force flag.
$ pipx install --force <program>==<version>
Uninstall a program
The command pipx uninstall removes an program and its environment,
$ pipx uninstall <program>
The command pipx uninstall-all removes all programs.
Reinstall all programs
The command pipx reinstall-all allows users to change the Python version used in virtual environments.
$ pipx reinstall-all
Installing Pipx ties it to a specific Python version, either with a Python copy or symbolic link in the ~/.local/ folder. If you change a Python version, you can continue to use Pipx programs but you may want to update the programs to run using the new Python version. You probably won't do this often, if at all.
Run an application without prior installation
With pipx run, users can execute Python programs from PyPI in a temporary environment.
$ pipx run youtube-dl https://www.youtube.com/watch?v=<video_id>
You might use this if you want to test an program but don't want it installed on your computer.
Install Pipx without Homebrew
You may already have Python installed via Xcode Command Line Tools, Homebrew-installed Python, Pyenv, or UV. See Mac Python for a comparison of Python installation methods. I'm providing instructions for various Python installations. However, there are complications or drawbacks to combining Pipx with these Pythons. In general, it is best to install Pipx with Homebrew as described above for running standalone Python utilities. For programming projects, I suggest to Install UV with its default Python for programing tools and specific folder-based Python versions for each project.
Python 3.9.6 installed with Xcode Command Line Tools is an older version but can be used with Pipx and is suitable for running scripts and utilities. For running Python utilities, you can alias the python command to python3 and use the system Python installed by Xcode Command Line Tools. See the article alias python3 to python.
Versions of Python installed with Pyenv, UV, or the official Python installer are best used for programming projects. With these Python versions, Pipx can be used for programming tools that you want to use globally.
If you already have Python installed, you can run python -m pip install --user pipx. This command installs Pipx using pip which is the Python package utility. The python -m command ensures that the pip command is run with the Python interpreter that is currently active and not another version (avoiding conflicting versions of pip). The --user flag installs the package in the user's home directory in a folder which does not require administrator privileges and does not interfere with system packages.
$ python -m pip install --user pipx
This is the safest, least-conflict-prone, option to install Pipx if you already have Python installed.
Python via Homebrew
Note that you cannot use the Homebrew-installed Python to install Pipx with pip. If you try to install Pipx with the Homebrew Python, you will see the message error: externally-managed-environment (see error: externally-managed-environment). Pip prevents global package installation with error: externally-managed-environment if you attempt to install a package without a virtual environment. Instead, use brew install pipx.
Python via Xcode Command Line Tools
If you install Pipx with pip using the Python version installed with Xcode Command Line Tools, pipx will be installed in /Users/username/Library/Python/3.9/bin which is not on the Mac PATH. You are prevented from installing Pipx within the system Python directories to avoid polluting the system Python. Instead, a copy of Python 3.9.6 is installed in the user's home directory in the /Users/username/Library/Python/3.9/lib folder.
You must add the Pipx executable to your PATH. You can edit your ~/.zprofile file:
export PATH="/Users/username/Library/Python/3.9/bin:$PATH"
After restarting your terminal or sourcing the configuration file (source ~/.zprofile), you can run pipx ensurepath to add the ~/.local/bin folder to your PATH. Restart your terminal or source the configuration file again. Now you can install programs with Pipx, for example pipx install cowsay.
There's a problem with this approach. Pipx now requires a separate folder /Users/username/Library/Python/3.9/ set in the Mac PATH. The installation is "brittle"; that is, difficult to maintain. For this reason, I recommend installing Pipx directly with Homebrew using brew install pipx.
Python via Pyenv
Pyenv is typically installed using Homebrew (see Install Pyenv). Pyenv allows you to install multiple versions of Python and switch between them. If you installed Pyenv with Homebrew, I don't recommend installing Pipx with Pyenv by running python -m pip install --user pipx (shell commands will fail mysteriously!). Instead, use Homebrew to install Pipx with brew install pipx.
You must use the command pipx ensurepath to add export PATH="$PATH:/Users/username/.local/bin" folder to your Zsh configuration files. Restart your terminal or source the configuration file (source ~/.zprofile).
Pipx will use the Homebrew-installed Python and create necessary symbolic links in the ~/.local/pipx folder. You can now install Python utilities and tools with Pipx. Appropriately, the Homebrew-installed Python will be used to globally run programming tools and Pyenv-installed Python versions will be used for programming projects.
There's a drawback to this approach. Homebrew can automatically update the Homebrew-installed Python. Changing the version of the Homebrew-installed Python will break the symbolic links in the ~/.local/pipx folder. You will need to reinstall the Python utilities and tools with Pipx. For this reason, I prefer to Install UV and use UV's default Python version for Pipx, consolidating all Python versions under UV.
Python via UV
There's no need to use Pipx with UV because UV provides built-in commands for tool management that replace Pipx. You can use the commands uv tool install or the shorthand uvx command instead of Pipx. See the documentation for UV Tools.
Continue setting up your Mac
Don't miss the full visual roadmap and checklist that shows how to set up a Mac for software development, with all the essential tools and settings you might not yet know about.