Install a Homebrew Package
Here's how to install a package with Homebrew on a Mac using brew install.
Before you get started
You'll need a terminal application to install a Homebrew package. Apple includes the Mac terminal but I prefer Warp Terminal. Warp is an easy-to-use terminal application, with AI assistance to help you learn and remember terminal commands. Even if you already use another terminal, now’s a good time to download Warp and try it for free.
Install a Homebrew Package - Step by Step
Here are the steps to install a package with Homebrew on a Mac.
brew search <package>to see if a package is availablebrew updateto update Homebrewbrew doctorto check that Homebrew is readybrew install <package>to install a packagebrew list <package>to verify installationbrew pin <package>(optional to lock a version)
Brew search
You can learn that a language or tool is available for Homebrew installation from README or installation instructions. Or you can use brew search <package> to see if a package is available. Here we search for the tree package, a useful Unix command that displays directories and files as a diagram.
$ brew search tree
==> Formulae
as-tree             pstree              tree-sitter         treefrog
cherrytree          tree ✔              treecc
A search will show the "formulae" (packages) that are available for installation. A checkmark ✔ will indicate a package is already installed on your machine.
Brew list
Use brew list to see all the packages in your local environment.
$ brew list
It will show dependencies as well as packages you've installed.
Brew update
Before you install any software package with Homebrew, run brew update to update Homebrew. Updating Homebrew can take many minutes, so run the update before trying to install a package. It is better to run the update yourself rather than waiting for Homebrew to run the updates automatically. This will update any core dependencies that your package may need.
$ brew update
Already up-to-date.
This updates Homebrew itself. It can take many minutes to run an update.
Homebrew core packages are updated as often as every day, so it is likely you will see updates.
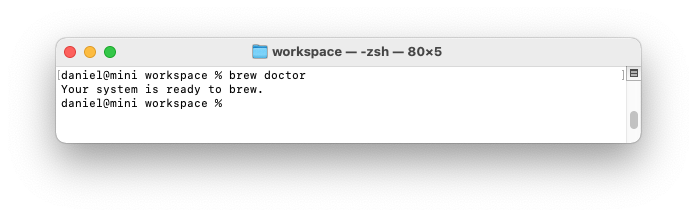
Brew doctor
Before you install any software package with Homebrew, run brew doctor to check that Homebrew is ready to install a package.
$ brew doctor
Your system is ready to brew.
Brew install
Now you can install a software package with brew install <package>. For example, here's how to install the tree package.
$ brew install tree
==> Downloading https://ghcr.io/v2/homebrew/core/tree/manifests/1.8.0
######################################################################## 100.0%
==> Downloading https://ghcr.io/v2/homebrew/core/tree/blobs/sha256:b9d1925b5b306
==> Downloading from https://pkg-containers.githubusercontent.com/ghcr1/blobs/sh
######################################################################## 100.0%
==> Pouring tree--1.8.0.arm64_big_sur.bottle.tar.gz
🍺  /opt/homebrew/Cellar/tree/1.8.0: 8 files, 158.5KB
The console will show the downloaded files and dependencies. The console also shows the location of the installed package (Homebrew calls it a "keg").
The console may show post-install instructions labelled "Caveat." It is important to read the "Caveat" though sometimes it is cryptic.
Sometimes a language or software package requires post-install steps, usually to set a shell configuration. Often, the post-install instructions are found only on the package website. The Homebrew maintainers say that general post-install instructions should be covered in documentation, not in caveats. Caveats are only for Homebrew-specific quirks or issues. If a package doesn't work after installation, check the installation instructions to see if you must configure the shell or $PATH variable in the ~/.zprofile or ~/.zshrc file.
Install a specific version with Homebrew
You may wish to install a specific version of a package using Homebrew. For example, Ruby 3.4 may be the newest version installed by Homebrew but you need to work on an application that requires Ruby 2.7.3. Unfortunately, there's no easy way to install an older package version with Homebrew. Blog posts by Christoph Michel and Remarkablemark detail a complex hack to install older package versions. Really, it's better to use Homebrew to install a version manager that allows installation and switching among different versions. You can Install Asdf if you are working with multiple languages and multiple versions (for example, Ruby and Node).
Prior to Homebrew version 2.6.0, released in December 2020, Homebrew contained a brew switch command that allowed switching between package versions. As of Homebrew 2.0.0, when it began removing old packages automatically after brew upgrade and running brew cleanup every thirty days to remove packages that are no longer current, brew switch became less useful and was deprecated and removed.
Verify with brew list
After installing a package, use brew list <package> to verify that it has been installed. You'll see all the installed files.
$ brew list tree
/opt/homebrew/Cellar/tree/1.8.0/bin/tree
/opt/homebrew/Cellar/tree/1.8.0/share/man/man1/tree.1
You can also see a list of dependencies for the package, if there are any.
$ brew deps <package>
Brew pin
Some packages (particularly programming languages such as Ruby or Python) are dependencies of other packages. They may be automatically upgraded during the installation of another package. If you must use only the currently installed version of a package, you can block automatic updates using brew pin <package>. For example, pin Ruby so that a newer version cannot be automatically installed:
$ brew pin ruby
The command will not show a response but you can verify with brew info <package>.
$ brew info tree
tree: stable 1.8.0 (bottled) [pinned at 1.8.0]
.
.
.
You can remove the pin when you wish to install a newer version of a package.
$ brew unpin tree
$ brew info tree
tree: stable 1.8.0 (bottled)
.
.
.
You'll need to run brew info <package> to see the changed status.
Upgrade a package
Use brew upgrade to install the newest version of a package.
Homebrew is designed to install the latest stable version of any package. There is no practical way to upgrade to a specific version that is not the version chosen by Homebrew.
$ brew upgrade <package>
Note that brew update and brew upgrade are different. Update is for Homebrew itself. Upgrade is for individual software packages.
Continue setting up your Mac
You may need to Uninstall a Homebrew package to delete or remove a package.
Homebrew can install programming languages and developer tools. See our guides for Java, Python, and Ruby. Be sure to Configure Git and add a language version manager (I recommend Mise).
Don't miss the full visual roadmap and checklist that shows how to set up a Mac for software development, with all the essential tools and settings you might not yet know about.